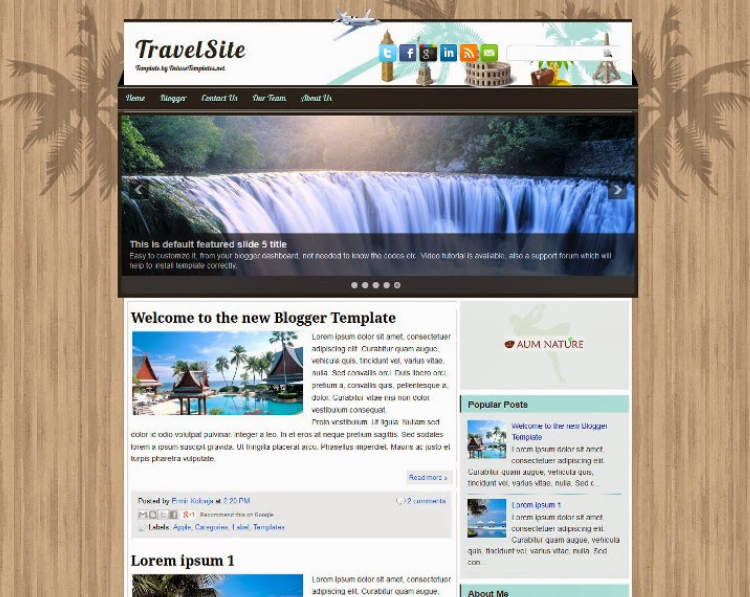
Creating a travel blog website can be an exciting adventure. Whether you plan to use it to share your travel experiences with family and friends, or use it as a platform for your business, it doesn’t have to be a complicated process. Here are 5 simple steps to get you started on creating your own travel blog website.
First, you’ll need to choose a domain name. This is the address of your website, and will be what visitors type into their browser to access your travel blog. Try to pick something that’s short, memorable, and related to the focus of your blog.
Step 1: Choose a Platform
Creating a travel blog website can seem daunting, but it is actually relatively easy. There are several important steps you need to take, which start with choosing the right platform for your website. There are many options out there, and each one has its own advantages and disadvantages. Some of the most popular platforms include WordPress, Wix, Joomla, Squarespace, and Weebly.
When selecting a platform, consider what features you need. WordPress is probably the best choice for a travel blog, because it is highly customizable, easy to use, and has a large selection of themes and plugins perfect for a travel blog. Wix and Squarespace are also popular for their ease of use, and if you need e-commerce features Weebly and Joomla are both great choices.
Here are some of the key considerations you should keep in mind when selecting a platform for your travel blog:
- Customizability – how easily can you customize the blog to fit your exact needs?
- Ease of Use – how difficult is the platform to use?
- Themes & Plugins – does the platform have a wide selection of themes and plugins available?
- E-Commerce – if you plan to sell products or services, does the platform offer the necessary features?
Take some time to explore the various platforms and decide which one is best for you. Once you have selected the platform, you can move on to building your travel blog and start sharing your amazing stories.
Step 2: Register a Domain Name for Your Website
The next step to create a travel blog website is to register a domain name, which will serve as the website address. Domain names are usually available as .com, .net, .org, .biz, and others. In choosing a domain name, you should consider the following:
- Your domain name should be as short as possible.
- It should be easily recognizable and rememberable.
- It should enable people to connect your website to your travel blog’s theme.
- If possible, it should include your travel blog’s name or the main keyword associated with it.
Once you have chosen your domain name, you will need to register it. This is a simple process and takes only a few minutes. First, go to a domain name registrar’s website and search for the domain name’s availability. If the domain name you want is available, you can proceed to check out and pay for the domain name. Once the payment is complete, the domain name will be registered in your name and will be added to your account.
Alternatively, you could use a web hosting service as your domain name registrar. Many web hosting companies provide domain registration services. They usually offer competitive rates and provide you with a wide selection of domain name extensions. Also, they might offer discounts and other deals if you host your website with them.
Once your domain name is registered, you have successfully completed the second step in creating a travel blog website.
Step 3: Find a Web Host
A web host is simply a storage service that allows your website to be accessible on the internet. After researching different hosting services, you may want to decide if you prefer a shared website hosting or if you need a more customized hosting solution such as Managed Hosting or Dedicated Hosting.
Before selecting a hosting solution, it’s important to consider the needs of your travel blog. Below are a few advantages and disadvantages of the different hosting solutions that you may consider.
- The cost is less than that of dedicated hosting (generally).
- You share space on a server with other websites, support can be slower than with other hosting solutions.
- It is faster and easier to set up than other hosting solutions.
- It is easier to move from a shared to another hosting solution down-the-road.
Managed Hosting
- The cost is more than a shared hosting (typically).
- The hosting service manages the server for you.
- With the server managed, the security of your travel blog will be higher than with a shared hosting.
- It is typically faster than a shared hosting as well.
Dedicated Hosting
- This is the most expensive hosting option.
- Your travel blog will be hosted on its own server.
- This is the fastest hosting solution.
- You will have the greatest control over the server and configuration.
After considering the options, you’ll want to make the best decision for your travel blog website. It’s always important to compare the features and prices of different hosting services to make sure you are getting the best value.
Step 4: Design & Install Your Website
Now that you have registered your domain name, signed up with a hosting company, installed WordPress, and chosen a template to design your blog, you are ready to start customizing your blog and install it online.
You now need to customize, design, and make your travel blog the blog you have always wanted. Here are the steps you need to follow:
- Log in to your WordPress dashboard. To do this, go to your website URL and add ‘/wp-admin’ to the end of the URL. This should take you to your WordPress dashboard.
- Go to Appearance > Themes. Select the theme you chose earlier and click ‘Activate’
- Go to Appearance > Widgets. You will find a wide variety of customizable widgets that can help you add more great features to your blog.
- Go to Appearance > Customize. You can play around with the different customization options and preview the changes you make. This is the time to make sure your blog looks great!
- Go to Settings > General. Make sure all of your settings look good and adjust or add any information you like.
Once you are satisfied with the design and customization of your blog, you are now ready to install it! You can do this by simply clicking on ‘Save and Publish’ under ‘Appearance > Customize.’ Your blog is now installed and live!
Step 5: Add Content & Published
Once your blog website is up and running, you need to update it with content. You can get started by publishing travel-related articles on your blog. After writing the article, be sure to edit it for errors. Then add relevant images to enhance the content of your article. Once done, click the ‘Publish’ button at the top right corner of the article editor.
In addition to articles, you can add travel guides, video content, podcasts, and other media. You can also create separate pages for important information such as travel blog mission statements, contact information, and blog policies.
Once your content is ready and up-to-date, you can share it with the world. Posting content on social media and engaging with industry professionals are good strategies to start building organic traffic for your travel blog. Additionally, it is important to apply the right keywords to your content to increase the blogs visibility.
Exploring A World Of Adventures Through Travel Blogging
Creating a travel blog website is a great way to start sharing your stories and adventures with the world. Whether you are an avid traveler or a budding writer, with the right resources and tools, your blog can be an enjoyable and profitable journey. By following the five simple steps we outlined, starting a travel blog has never been easier. From setting up the platform, to customizing the look and feel; you’ll be ready to take off on your blogging journey in no time!
Don’t forget to invite your friends and family to join the adventure! You can easily share your blog posts on social media platforms, and with the right keywords, your content can be seen by thousands of potential readers. It’s time to create a traveler’s paradise and get ready to share your wonderful experiences!


