

In today’s digital age, a reliable Wi-Fi connection has become a necessity for most laptop users. However, there are times when we encounter frustrating connectivity issues that hinder our productivity and online activities. If you’re facing Wi-Fi problems on your laptop, fret not! In this article, we will guide you through the troubleshooting process to help you regain a stable and uninterrupted internet connection.
First and foremost, it’s essential to check your Wi-Fi hardware and network settings. Make sure that your laptop’s Wi-Fi adapter is turned on and properly connected to your network. You can access the Wi-Fi settings by clicking on the network icon in the system tray or navigating through the control panel. If the Wi-Fi adapter is enabled and connected to the correct network, but you’re still experiencing connectivity issues, it might be worth restarting your laptop as a simple reboot can resolve many temporary glitches.
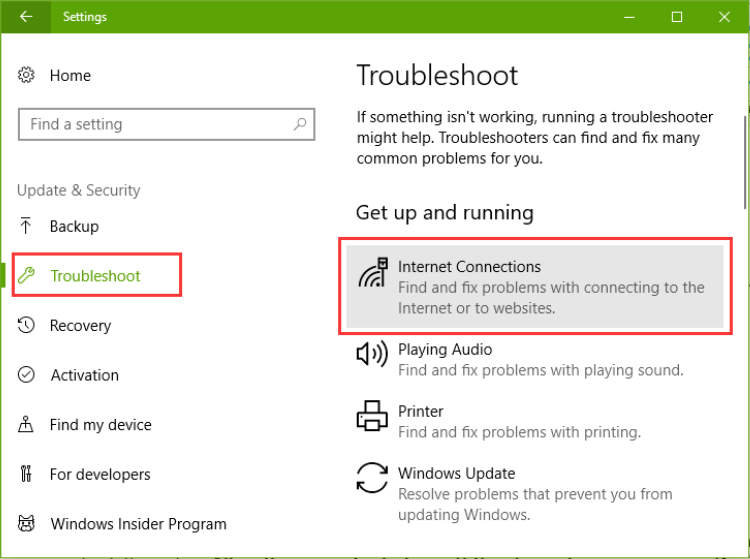
Checking Wi-Fi Connection
Having a stable and reliable Wi-Fi connection is essential for a smooth internet experience on your laptop. If you are experiencing connectivity issues, here are a few steps you can take to troubleshoot and fix the problem:
- Ensure Wi-Fi is turned on: Check if the Wi-Fi function on your laptop is enabled. Look for the Wi-Fi icon in the taskbar or system tray, and make sure it is not turned off or in airplane mode.
- Restart your laptop and router: Sometimes, a simple reboot can resolve temporary connection problems. Turn off your laptop and unplug your Wi-Fi router. Wait for a few seconds, then plug in the router and turn on your laptop again.
- Check Wi-Fi signal strength: Move closer to your router and see if the Wi-Fi signal strength improves. Obstacles like walls or electronic interference can weaken the signal. If you have a weak signal, consider repositioning your router or using a Wi-Fi range extender.
- Verify network credentials: Ensure that you are connected to the correct Wi-Fi network and that you have entered the correct password. Sometimes, mistakenly connecting to a different network or using an incorrect password can cause connection issues.
- Update Wi-Fi drivers: Outdated or faulty Wi-Fi drivers can cause connectivity problems. Visit your laptop manufacturer’s website or the Wi-Fi adapter manufacturer’s website to download and install the latest drivers.
- Disable power-saving mode: Some laptops have power-saving features that can affect Wi-Fi connectivity. Go to your laptop’s power settings and disable any power-saving mode that may be turning off your Wi-Fi adapter.
- Reset network settings: If none of the above steps work, you can try resetting your network settings. Go to the network settings on your laptop and choose the option to reset or forget the Wi-Fi network. Then, reconnect to the network and enter the password again.
By following these steps, you should be able to troubleshoot and resolve most Wi-Fi connectivity issues on your laptop. If the problem persists, it may be worth contacting your internet service provider or seeking further technical assistance.
Troubleshooting Wi-Fi Adapter
If you are experiencing Wi-Fi connectivity issues on your laptop, it could be due to problems with your Wi-Fi adapter. Here are some troubleshooting steps you can take:
1. Restart your laptop and Wi-Fi adapter:
- Turn off your laptop and unplug the power cable.
- Unplug the Wi-Fi adapter from the USB port and wait for a few seconds.
- Plug the Wi-Fi adapter back into the USB port.
- Turn on your laptop and see if the Wi-Fi connection is restored.
2. Update Wi-Fi adapter drivers:
Outdated or incompatible Wi-Fi adapter drivers can cause connectivity issues. To update the drivers:
- Open the Device Manager by pressing the Windows key + X and selecting Device Manager from the menu.
- Expand the Network adapters category and find your Wi-Fi adapter.
- Right-click on the Wi-Fi adapter and select Update driver.
- Follow the on-screen instructions to update the driver.
3. Check Wi-Fi adapter settings:
Ensure that the Wi-Fi adapter settings are configured correctly:
- Open the Control Panel and go to Network and Internet > Network Connections.
- Right-click on your Wi-Fi adapter and select Properties.
- In the Properties window, make sure that the “Connect automatically when this network is in range” option is enabled.
- Click on the “Configure” button and check the settings for your adapter.
4. Reset network settings:
If none of the above steps work, you can try resetting the network settings:
- Open the Command Prompt as an administrator.
- Type the command “netsh winsock reset” (without quotes) and press Enter.
- Restart your laptop and check if the Wi-Fi connectivity issues are resolved.
By following these troubleshooting steps, you should be able to resolve Wi-Fi connectivity issues with your laptop’s Wi-Fi adapter. If the problem persists, consider contacting your internet service provider or seeking professional assistance.
Resetting Network Settings
In this article, we will guide you on how to reset network settings on your laptop to troubleshoot Wi-Fi connectivity issues. If you are experiencing problems with your Wi-Fi connection, such as slow internet speed, frequent disconnections, or difficulty connecting to a network, resetting the network settings can often resolve these issues.
Before Resetting Network Settings:
- Make sure you have the administrative access to your laptop.
- It is recommended to back up any important files or documents.
- Note down any Wi-Fi network passwords or settings as they will be erased during the reset process.
Steps to Reset Network Settings:
- Click on the “Start” menu and select “Settings.”
- Go to the “Network & Internet” section.
- Select “Wi-Fi” from the left-hand menu.
- Click on “Advanced options” at the bottom of the Wi-Fi settings menu.
- Scroll down and click on “Network reset.”
- Read the warning message and click on “Reset now” to confirm.
- Your laptop will restart, and the network settings will be reset to their default values.
After the reset process is completed, you will need to reconnect to your Wi-Fi network(s) and re-enter the passwords, if required. This should resolve any Wi-Fi connectivity issues you were experiencing. If the problem persists, you may need to contact your internet service provider (ISP) for further assistance.
Remember that resetting network settings will also remove any other customizations made to your network settings, such as VPN configurations or static IP addresses. Make sure to take note of these settings before proceeding with the reset.
Conclusion
In conclusion, troubleshooting Wi-Fi connectivity issues on a laptop can be a daunting task, but with the right steps, it is possible to resolve the problems and regain a stable internet connection. Firstly, it is important to identify the underlying causes of the connectivity issues, such as signal interference or outdated drivers. Once identified, appropriate action can be taken, such as repositioning the router or updating the laptop’s drivers. Additionally, checking the network settings, disabling unnecessary programs, and resetting the network configurations can also help in resolving Wi-Fi connectivity problems. By following these troubleshooting steps, users can improve their laptop’s Wi-Fi connectivity and enjoy uninterrupted internet browsing.
To conclude, troubleshooting Wi-Fi connectivity issues requires a systematic approach and attention to detail. It is essential to diagnose the problem accurately and implement the appropriate solutions based on the specific issue. Patience and perseverance are key during this process, as some problems may have multiple factors contributing to the poor connectivity. However, with persistence and the right troubleshooting techniques, users can overcome Wi-Fi connectivity issues and enjoy a seamless internet experience on their laptops.