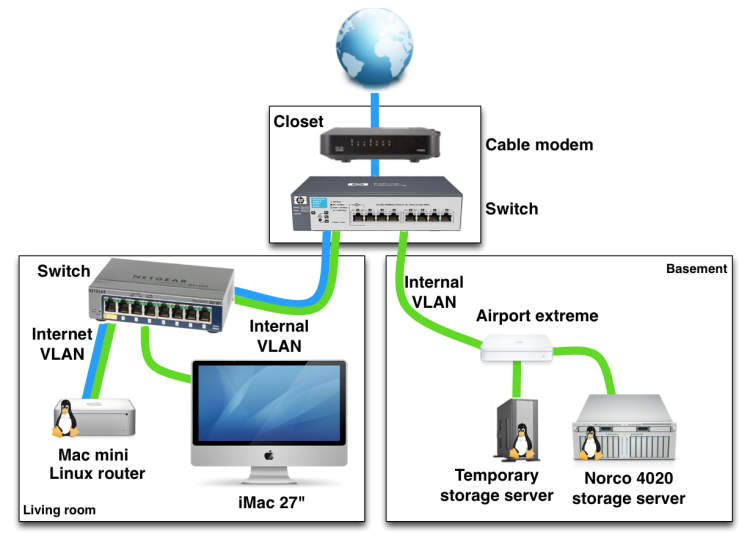
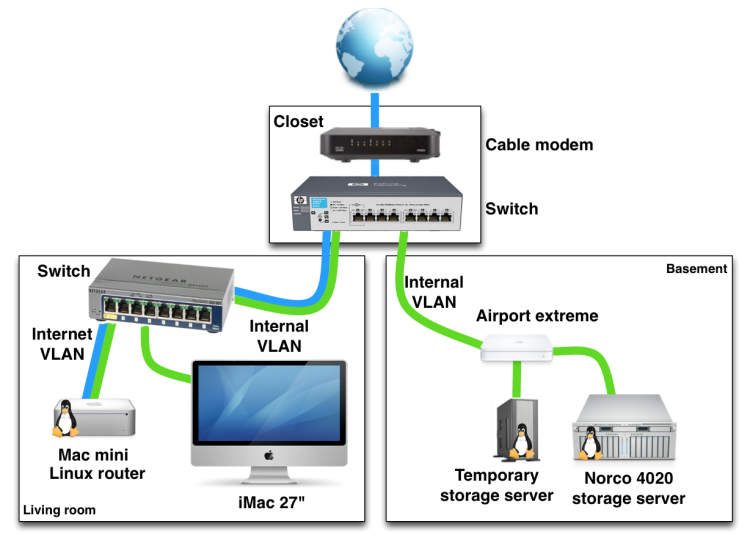
Setting up and managing a home network on a laptop might seem like a daunting task, but with the right steps, it can become a seamless experience. In today’s interconnected world, a reliable home network is essential for accessing the internet, sharing files, and connecting multiple devices. Whether you are a tech-savvy individual or a beginner, this article will guide you through the process of establishing and maintaining a home network on your laptop, ensuring seamless connectivity and maximum efficiency.
The first step in setting up a home network is to determine your requirements and select the appropriate network equipment. This includes routers, modems, and network cables. Once the equipment is assembled, it is essential to configure the router properly, ensuring security and optimal performance. In this article, we will explore the necessary steps to set up your home network, from connecting the hardware to configuring the network settings. Additionally, we will provide tips on managing your network effectively, including troubleshooting common issues and optimizing performance. So, grab your laptop and let’s dive into the world of home networking!
Choosing the right network equipment
Building a reliable and efficient home network requires selecting the right network equipment. Here are some factors to consider before making your decision:
1. Internet Service Provider (ISP)
Your choice of network equipment should be compatible with your ISP’s requirements. Check if your ISP requires specific modems or routers, and make sure to choose the appropriate equipment accordingly.
2. Router Features
Consider the features you need in a router, such as Wi-Fi standards (e.g., 802.11ac for faster connections), dual-band capability (2.4 GHz and 5 GHz) for better coverage, and the number of Ethernet ports for connecting wired devices.
3. Wireless Range and Coverage
Assess the size of your home and the range you need for wireless coverage. Depending on the area you want to cover, you may need additional access points or Wi-Fi extenders to ensure a strong and stable connection throughout your home.
4. Security Features
Look for routers that offer strong security features such as WPA3 encryption, built-in firewalls, and guest network options. These features are essential for protecting your network from potential security threats.
5. Budget
Consider your budgetary constraints when selecting network equipment. Determine the features and performance you require while staying within your allocated budget.
By considering these factors, you can make an informed decision and choose the right network equipment that suits your home network setup.
Setting up a Wireless Network Connection

Having a wireless network connection at home can provide convenience and flexibility for all your devices. Whether you’re setting up a new network or troubleshooting an existing one, here are some steps to help you get started.
1. Determine the type of wireless network
There are several types of wireless networks available, including Wi-Fi, Bluetooth, and cellular networks. Determine which type suits your needs and the devices you want to connect.
2. Check your equipment
Before setting up a wireless network, make sure you have the necessary equipment. This typically includes a wireless router or access point, a modem, and compatible devices such as laptops, smartphones, or tablets.
3. Choose a suitable location
Find a central location for your wireless router or access point to ensure optimal signal coverage. Avoid placing it near thick walls or objects that can interfere with the signal.
4. Connect your modem to the internet
If you haven’t already, connect your modem to the internet service provider’s network using an Ethernet cable. Follow the instructions provided by your ISP to establish a connection.
5. Connect the router to the modem
Once the modem is connected to the internet, connect your wireless router or access point to the modem using an Ethernet cable. Ensure the router is powered on and follow the manufacturer’s instructions to complete the setup.
6. Configure wireless settings
Access the router’s settings page using a web browser and enter the necessary login credentials. From there, you can configure wireless settings such as the network name, password, and security type.
7. Connect devices to the network
Once the wireless network is set up, connect your devices to it. Locate the Wi-Fi settings on your device, search for the network name (SSID) you set up, enter the password if required, and establish a connection.
8. Test the network connection
To ensure everything is working correctly, test the network connection on your devices. Open a web browser and try to access a website. If you encounter any issues, refer to the router’s troubleshooting guide or contact your ISP for assistance.
9. Manage and secure your home network
To manage and secure your home network, consider changing the default login credentials, enabling network encryption, and regularly updating your router’s firmware. Additionally, you can create separate guest networks and set parental controls if needed.
By following these steps, you can easily set up and manage a wireless network connection at home. Enjoy the convenience of wireless connectivity across your devices!
Managing and Troubleshooting Your Home Network
Setting up and managing a home network on a laptop can be a daunting task, but with the right knowledge and troubleshooting techniques, you can ensure a smooth and reliable network connection for all your devices. In this article, we will guide you through the process and provide tips for troubleshooting common network issues.
1. Plan Your Network Setup
Before diving into the setup process, it’s essential to have a clear plan for your home network. Consider the following:
- The number of devices you want to connect
- The distance between your devices and the router
- The desired network speed and coverage
- Security measures to protect your network
2. Choose the Right Router
The router is the heart of your home network, so it’s crucial to choose the right one. Look for a router that meets your network requirements, such as dual-band support for better performance and compatibility with the latest wireless standards. Additionally, consider routers with built-in security features like a firewall and WPA2 encryption.
3. Connect and Configure Your Router
Once you have your router, follow these steps to connect and configure it:
- Connect the router to your modem using an Ethernet cable.
- Access the router’s admin panel by opening a web browser and entering the router’s IP address.
- Set up a strong network password to prevent unauthorized access.
- Configure the network settings, including the network name (SSID) and wireless security.
4. Connect Your Devices
After setting up the router, it’s time to connect your devices. Most devices nowadays support Wi-Fi connectivity, so you can easily connect them to your network by scanning for available networks and entering the network password. For devices that don’t support Wi-Fi, you can use Ethernet cables to establish a wired connection.
5. Troubleshooting Common Network Issues
Even with proper setup, network issues may still arise. Here are some common problems and troubleshooting tips:
- Slow network speed: Try moving your devices closer to the router or reducing interference from other devices.
- Intermittent connection: Restart your router and check for any firmware updates.
- No internet access: Verify that your modem is connected to the internet and contact your ISP if necessary.
- Device connectivity issues: Restart the device or check for any software updates.
By following these steps and troubleshooting tips, you can effectively set up and manage your home network on a laptop. Enjoy a seamless internet experience and stay connected!
Conclusion
In conclusion, setting up and managing a home network on a laptop is a relatively simple process that can greatly enhance your digital connectivity at home. By following the steps outlined in this article, you can establish a secure and efficient network that allows you to share files, printers, and internet access between devices seamlessly.
Remember to start by choosing the right router and ensuring it is placed in a central location for optimal coverage. Then, configure the network settings, including setting up a strong password, enabling firewall protection, and implementing other security measures to safeguard your network from unauthorized access.
Furthermore, take advantage of network sharing options to connect your devices and enable file and printer sharing. This will allow you to access files and peripherals from any device connected to the network, eliminating the need for physical transfers and making your digital life more convenient.

