Cleaning the laptop fan and vents is crucial for maintaining optimal performance and preventing overheating issues. Over time, dust and dirt can accumulate in these areas, restricting airflow and causing the fan to work harder. In this article, we will guide you through the process of cleaning your laptop’s fan and vents, ensuring your device runs smoothly and efficiently.
Before we begin, it’s important to note that cleaning the laptop fan and vents may vary depending on the laptop model. Therefore, always refer to your manufacturer’s guidelines or user manual for specific instructions. That being said, the general steps we’ll outline here should give you a good starting point for cleaning your laptop’s fan and vents effectively.
Understanding the Importance of Cleaning Laptop Fan and Vents
When it comes to maintaining your laptop’s performance and longevity, one of the most crucial maintenance tasks is regularly cleaning the laptop fan and vents. The fan and vents play a critical role in keeping your laptop cool and preventing overheating, which can lead to various issues, including reduced performance, system crashes, and even permanent damage to internal components.
Why is Cleaning Laptop Fan and Vents Important?
Over time, dust, dirt, and debris can accumulate on the laptop fan blades and vents, obstructing the airflow and preventing efficient cooling. This buildup of debris can cause the fan to work harder, resulting in increased noise levels and reduced cooling capacity. Consequently, your laptop may start to overheat, leading to decreased performance and potential hardware failures.
The Benefits of Cleaning Laptop Fan and Vents:
- Improved Performance: By maintaining clean laptop fan and vents, you ensure that the cooling system works effectively, allowing your laptop’s components to operate at optimal temperatures. This, in turn, helps maintain peak performance and prevents system slowdowns.
- Extended Lifespan: Overheating can significantly shorten the lifespan of your laptop. Regularly cleaning the fan and vents helps prevent heat-related damage to delicate internal components, such as the processor and graphics card, ultimately extending the overall lifespan of your laptop.
- Reduced Noise Levels: Accumulated dust and debris can cause the fan to become noisy as it struggles to maintain proper cooling. Cleaning the fan and vents helps restore proper airflow, resulting in a quieter and more pleasant working environment.
- Prevention of System Crashes: Overheating due to clogged fan and vents can lead to sudden system crashes and unexpected shutdowns. By keeping the cooling system clean, you reduce the risk of these disruptive events and improve the overall stability of your laptop.
How to Clean Laptop Fan and Vents:
Cleaning the laptop fan and vents is a straightforward process that can be done with basic tools and a little patience. Here are the general steps to follow:
- Power off your laptop and disconnect it from the power source.
- Locate the vent areas on your laptop. They are usually found on the sides or the bottom.
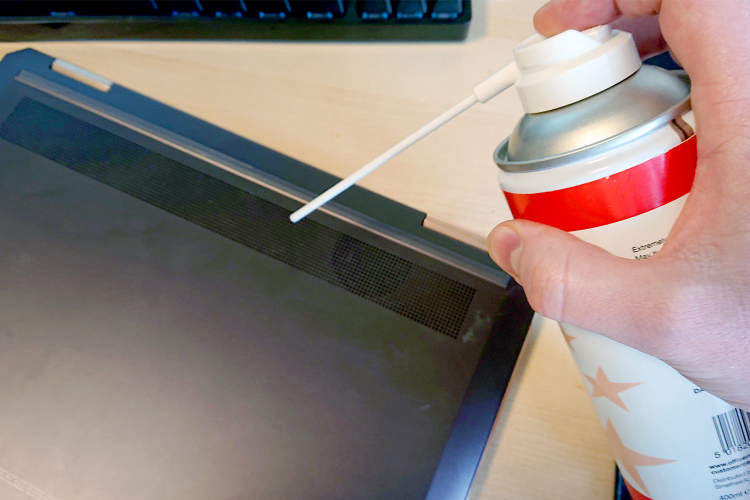
- Use a small brush or compressed air to gently remove the dust and debris from the vents.
- If necessary, open the laptop and locate the fan. Use the brush or compressed air to clean the fan blades, ensuring they are free from any obstructions.
- Reassemble the laptop and make sure all connections are secure.
- Power on your laptop and observe if the fan noise and cooling performance have improved.
It’s recommended to clean your laptop fan and vents at least every three to six months or more frequently if you use your laptop in dusty environments. By incorporating this simple maintenance task into your routine, you can significantly improve the performance and longevity of your laptop.
Gathering the Necessary Tools and Materials

Before starting the process of cleaning your laptop fan and vents, gather the following tools and materials:
- Screwdriver (check the type of screws used in your laptop)
- Compressed air canister
- Cotton swabs or soft brush
- Isopropyl alcohol
- Clean cloth or microfiber cloth
Having these items ready will ensure a smooth and effective cleaning process.
Step-by-Step Guide to Cleaning the Laptop Fan and Vents
Having a clean laptop fan and vents is crucial for maintaining optimal performance and preventing overheating. Over time, dust and debris can accumulate in these areas, leading to reduced airflow and potential hardware issues. Follow this step-by-step guide to effectively clean your laptop fan and vents:
- Gather the necessary tools: Before you begin, make sure you have the following tools ready: a small screwdriver, compressed air canister, soft brush, cotton swabs, and isopropyl alcohol.
- Power off and unplug your laptop: It’s essential to turn off your laptop and unplug it from any power source before you start cleaning. This will prevent any electrical mishaps or damage.
- Locate the fan and vents: Most laptops have vents on the sides or rear, and the fan is usually located underneath the laptop. Refer to your laptop’s user manual if you’re unsure.
- Remove the access panel or bottom cover: Using a small screwdriver, carefully remove the access panel or bottom cover to expose the laptop’s internal components.
- Gently remove the accumulated dust: Using a soft brush or compressed air canister, gently remove the dust from the fan blades, vents, and surrounding areas. Be cautious not to exert too much pressure to avoid damage.
- Clean hard-to-reach areas with cotton swabs: Dip a cotton swab in isopropyl alcohol and carefully clean any hard-to-reach areas, such as small crevices or fan grills. This helps to dissolve any stubborn dirt or grease.
- Reassemble and test: Once you’ve cleaned all the necessary components, reattach the access panel or bottom cover. Plug in your laptop, turn it on, and listen for any abnormal noises. Ensure that the fan is spinning smoothly and the vents are providing adequate airflow.
- Schedule regular maintenance: To prevent excessive dust buildup in the future, make it a habit to clean your laptop fan and vents regularly. This will prolong the lifespan of your laptop and maintain its performance.
By following this step-by-step guide, you can effectively clean your laptop fan and vents, ensuring optimal performance and preventing potential overheating issues. Remember to exercise caution and refer to your laptop’s user manual if needed. Happy cleaning!
Conclusion
The regular cleaning of laptop fans and vents is essential to ensure smooth functioning and longevity of the device. Neglecting this maintenance task can lead to overheating issues, decreased performance, and even permanent damage to the laptop components.
By following the simple steps mentioned in this article, users can effectively clean their laptop fans and vents. It is advisable to clean the fans and vents at least once every three to six months, or more frequently if the laptop is used in a dusty environment. Keeping the laptop clean will not only prevent hardware damage but also enhance the overall performance and user experience.

