Connecting a laptop to a projector is essential for presentations, conferences, or simply enjoying your favorite movies on a bigger screen. With just a few simple steps, you can easily connect your laptop to a projector and immerse yourself in a captivating visual experience. Whether you’re a tech novice or an experienced user, this article will guide you through the process and help you make the most out of your laptop-projector setup.
Firstly, you’ll need to gather the necessary equipment. Ensure that you have a compatible projector and a VGA, HDMI, or DisplayPort cable that matches the available ports on both your laptop and the projector. Additionally, locate the appropriate adapter if your laptop doesn’t have a dedicated port. Once you have everything ready, simply connect one end of the cable to your laptop’s video output port and the other end to the corresponding input port on the projector.
Preparing the laptop and projector
Connecting a laptop to a projector can be a straightforward process if you properly prepare both the laptop and the projector beforehand. This article will guide you through the steps to ensure a seamless connection.
1. Check the laptop and projector compatibility
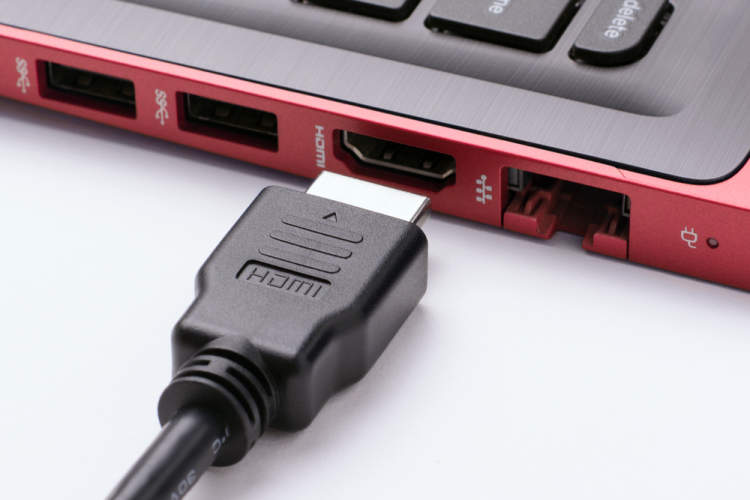
Before you begin, verify that your laptop and projector are compatible with each other. Ensure that the laptop has a compatible output port that matches the input port on the projector. Common output ports include HDMI, VGA, and DisplayPort.
2. Locate the output port on the laptop
Determine which output port your laptop has. It is usually located on the sides or the back of the laptop. Check the user manual or the manufacturer’s website for specific information about the location of the output port for your laptop model.
3. Gather the necessary cables and adapters
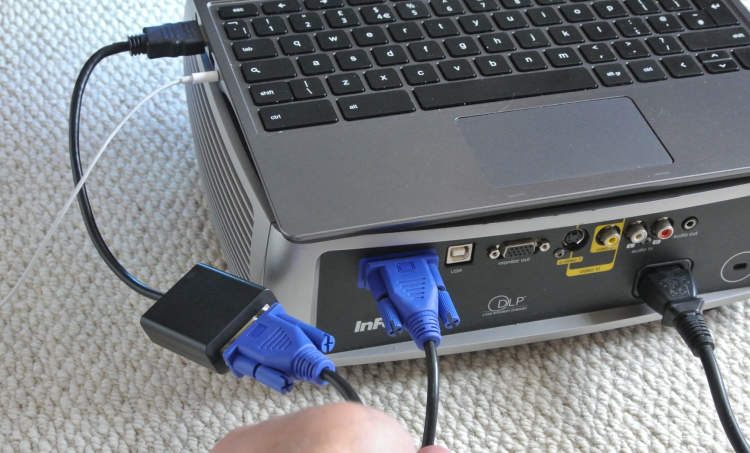
Depending on the type of output port on your laptop, you may need to gather the appropriate cables and adapters. For example, if your laptop has an HDMI port and the projector uses VGA input, you will need an HDMI to VGA adapter and a VGA cable. Make sure you have all the necessary accessories on hand before proceeding.
4. Power off the laptop and the projector
Prior to making any connections, ensure that both the laptop and the projector are powered off. This will prevent any potential damage to the devices during the connection process.
5. Connect the laptop to the projector
Now it’s time to connect the laptop to the projector. Take the appropriate cable and connect one end to the output port on the laptop and the other end to the input port on the projector. Ensure a secure connection on both ends.
6. Power on the laptop and the projector
Once the laptop and the projector are securely connected, power them on. Allow both devices to fully boot up before proceeding.
7. Configure the display settings on the laptop
After booting up, access the display settings on your laptop. Depending on the operating system, you can usually find the display settings in the control panel or system preferences. Select the appropriate display mode, resolution, and orientation to ensure the projector displays the laptop’s screen correctly.
8. Adjust the projector settings
Now it’s time to adjust the projector settings to optimize the display. Use the projector’s remote control or the on-screen menu to adjust the brightness, contrast, and keystone correction settings according to your preferences and the environment you are in.
9. Test the connection
Finally, test the connection by playing a video or displaying a presentation on your laptop. Make sure the content is properly displayed on the projector. If there are any issues, double-check the connections and settings.
By properly preparing the laptop and the projector, you can easily connect the two devices and enjoy a seamless viewing experience. Follow the above steps, and you’ll be ready to present in no time!
Connecting the laptop to the projector

Connecting a laptop to a projector can seem intimidating, but with the right steps, you can easily set it up. Whether you need to deliver a presentation or watch a movie on a bigger screen, here’s how you can connect your laptop to a projector:
Gather the necessary equipment
Before you begin, make sure you have the following equipment:
- A laptop with a video output port (HDMI, VGA, or DisplayPort)
- A compatible cable to connect the laptop to the projector
- A projector with the corresponding video input port
- An external audio system (optional)
Step-by-step guide
Follow these steps to connect your laptop to the projector:
- Turn off both your laptop and the projector.
- Connect one end of the video cable to your laptop’s video output port.
- Connect the other end of the video cable to the projector’s video input port.
- Power on the projector and select the correct input source (HDMI, VGA, or DisplayPort) using the projector’s remote or control panel.
- Turn on your laptop and wait for it to detect the projector.
- Adjust the display settings on your laptop to extend or duplicate the screen. This can be done by pressing the Windows key + P on Windows laptops or navigating to System Preferences > Displays on Mac laptops.
- If necessary, connect the audio cable from your laptop to the projector or external audio system for sound output.
- Test the connection by playing a video or launching a presentation on your laptop. The content should now be displayed on the projector screen.
Troubleshooting tips
If you encounter any issues during the connection process, consider the following troubleshooting tips:
- Check the cable connections to ensure they are secure.
- Make sure both your laptop and projector are powered on.
- Try different video input ports on the projector, especially if using multiple options (HDMI, VGA, DisplayPort).
- Verify that your laptop’s display settings are correctly configured.
- Update your laptop’s display drivers if necessary.
By following these steps, you can easily connect your laptop to a projector and enjoy a larger screen for presentations, movies, or any other content.
Adjusting Settings and Troubleshooting
Connecting a laptop to a projector can sometimes be challenging, but with the right settings and troubleshooting techniques, you can easily overcome any issues you may encounter. Here are some helpful tips:
1. Check the physical connections
Make sure that both your laptop and the projector are turned off before starting the connection process. Connect one end of the VGA or HDMI cable to your laptop’s video output port and the other end to the projector’s input port. Ensure that the connections are secure.
2. Select the correct input source
Once you have made the physical connection, turn on the projector and your laptop. On the projector’s remote control or control panel, select the correct input source for the connection (e.g., VGA or HDMI). This will allow the projector to receive the video signal from your laptop.
3. Adjust the display settings
On your laptop, go to the “Display Settings” or “Graphics Options” menu. Here, you can select the appropriate resolution and display mode for the projector. Choose the “Extend” or “Duplicate” mode depending on your needs. If the projector is not detected, you may need to click on the “Detect” button to refresh the display settings.
4. Verify audio settings
If you want to play sound through the projector, check the audio settings on your laptop. Ensure that the correct audio output device is selected. You may need to adjust the volume level on your laptop and the projector to achieve the desired sound quality.
5. Troubleshooting common issues
If you encounter any issues, try the following troubleshooting steps:
- Restart both the laptop and the projector.
- Ensure the cables are properly connected and not damaged.
- Update the graphics driver on your laptop.
- Check if the projector’s lamp/bulb is working or needs replacement.
- Try connecting the laptop to a different projector or vice versa to isolate the issue.
- Consult the user manual or contact the manufacturer’s support for further assistance.
By following these tips and troubleshooting steps, you should be able to successfully connect your laptop to a projector and enjoy hassle-free presentations or movie nights.
Conclusion
Connecting a laptop to a projector is a simple and crucial step in delivering effective presentations or enjoying multimedia content on a larger screen. By following a few easy steps, you can ensure a seamless connection and a successful projection experience.
First, make sure you have the necessary cables and adapters, such as HDMI or VGA cables, to connect your laptop and projector. It is also important to check if your laptop has the required ports for connection. Once you have the cables and adapters ready, connect one end of the cable to your laptop’s video output port and the other end to the projector’s appropriate input port.

