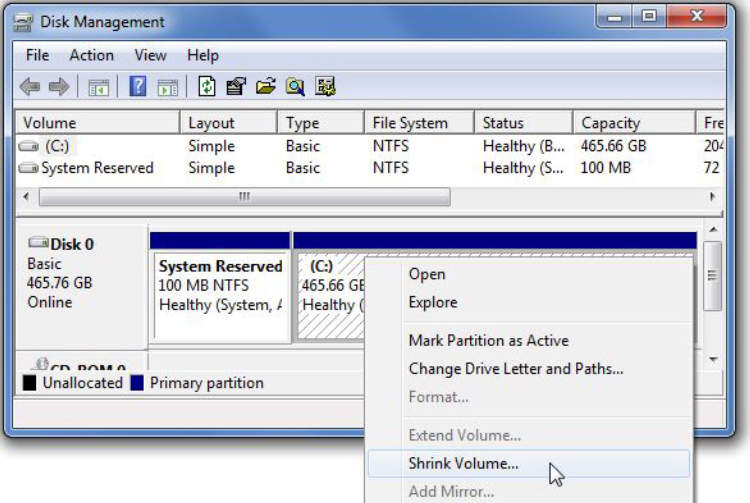
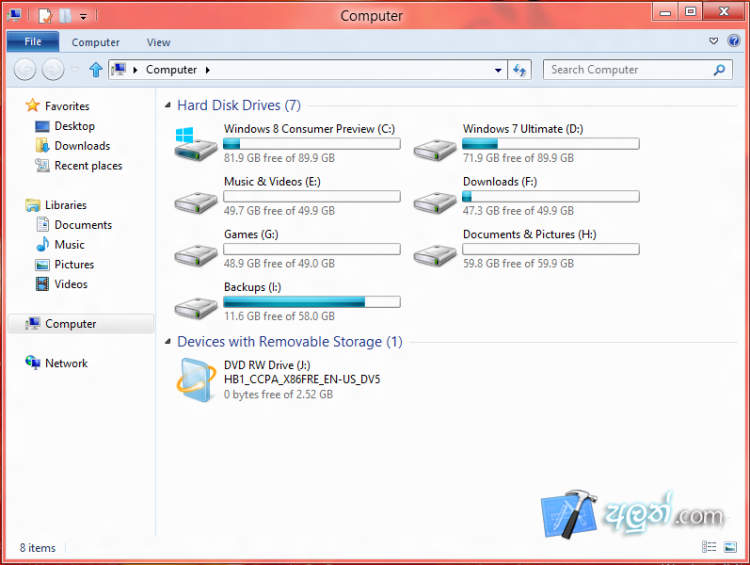
Partitioning a laptop hard drive can be a useful way to organize your data, increase efficiency, and improve the performance of your system. Whether you want to create separate partitions for different operating systems, allocate space for specific files, or simply want to better manage your storage, this article will guide you through the process of partitioning your laptop hard drive.
Before diving into the steps, it’s important to note that partitioning a hard drive involves manipulating the existing data on the drive. It is essential to back up all your important files before attempting any partitioning tasks to avoid data loss. Once you’ve taken proper precautions, you’ll be ready to follow the step-by-step instructions provided in this article, which will cover how to partition a laptop hard drive using either the built-in disk management tools in Windows or third-party partitioning software.
Introduction
Learn how to partition a laptop hard drive: a step-by-step guide.
Partitioning a laptop hard drive can be a useful practice, especially if you want to separate your operating system from your personal files or if you want to create multiple partitions to organize your data. This article will walk you through the process of partitioning a laptop hard drive, ensuring that you have the necessary information and tools to successfully complete the task.
Preparing for Partitioning

Before you begin the partitioning process on your laptop hard drive, it is important to take some preparation steps to ensure a smooth and successful partitioning process. Here are some essential things to consider:
1. Backup Your Data
Partitioning a hard drive can potentially lead to data loss or corruption, so it is crucial to back up all your important files and documents. This will safeguard your data against any accidental loss during the partitioning process.
2. Understand the Partitioning Options
It is essential to have a clear understanding of the different partitioning options available to you. Familiarize yourself with concepts such as primary partitions, extended partitions, and logical drives. This knowledge will help you make informed decisions when dividing your hard drive.
3. Evaluate Your Storage Needs
Partitioning allows you to allocate separate portions of your hard drive for different purposes. Before partitioning, assess your storage needs and determine how much space you require for each partition. Consider factors such as operating system requirements, software installations, and data storage requirements.
4. Plan Your Partitioning Strategy
Create a partitioning strategy based on your storage needs and preferences. Decide on the number and size of the partitions you wish to create. Consider whether you want separate partitions for the operating system, applications, data, or any other specific purpose.
5. Choose a Reliable Partitioning Tool
There are various partitioning software tools available that can assist you in the partitioning process. Research and choose a reliable tool that suits your needs and is compatible with your laptop’s operating system.
By following these preparation steps, you will be well-equipped to partition your laptop hard drive efficiently and avoid any potential complications or data loss.
Partitioning the Laptop Hard Drive
Partitioning your laptop’s hard drive can be a valuable step in organizing your data, optimizing performance, and enhancing data security. Follow these steps to partition your laptop hard drive:
1. Backup Your Data
Before you begin partitioning your laptop hard drive, it is crucial to backup all your important data. This ensures that in case of any unexpected issues during the partitioning process, you won’t lose any valuable files.
2. Understand the Benefits of Partitioning
Partitioning offers several benefits:
- Organized Storage: Partitioning allows you to separate different types of data into distinct sections, making it easier to locate and manage files.
- Improved Performance: A well-organized partitioned drive can enhance the overall performance of your laptop by reducing fragmentation.
- Enhanced Security: By creating separate partitions for your sensitive files, you can add an extra layer of security.
3. Choose a Partitioning Tool
There are various partitioning tools available in the market. Some popular tools include MiniTool Partition Wizard, EaseUS Partition Master, and GParted. Choose a reliable tool that suits your needs and download it onto your laptop.
4. Launch the Partitioning Tool
Once you have installed the partitioning tool, launch it on your laptop. Make sure to run it with administrator privileges to gain complete access to the hard drive.
5. Analyze Your Current Drive
Before creating new partitions, analyze your current drive and identify the amount of free space available. This will help you determine the suitable size for your partitions.
6. Create New Partitions
Using the partitioning tool, select the unallocated space on your hard drive and choose the option to create a new partition. Specify the size, file system, and label for each partition.
7. Apply Changes
Once you have created the desired partitions, review the changes, and click on the apply or execute button to apply the changes to your laptop’s hard drive. This process may take some time, depending on the size of your hard drive.
8. Format and Assign Drive Letters
After the changes have been applied, format each new partition and assign appropriate drive letters to make them accessible through the file explorer.
9. Test the Partitions
Once the partitioning process is completed, test each partition by transferring files, accessing them, and ensuring they function as intended.
10. Maintain and Manage the Partitions
Regularly maintain and manage your partitions by organizing files, performing periodic disk cleanup, and resizing partitions if needed. This will keep your laptop’s hard drive optimized and efficient.
By following these steps, you can successfully partition your laptop’s hard drive and enjoy the benefits of a well-organized and efficient storage system.
Conclusion
Partitioning a laptop hard drive is a crucial task that allows users to organize their data efficiently and improve system performance. By following the steps outlined in this article, you can easily create, resize, and manage partitions on your laptop’s hard drive.
Whether you want to separate your operating system files from your personal data or create dedicated partitions for different purposes, such as backups or different operating systems, partitioning provides a flexible solution. It enables you to allocate storage space effectively, ensure data security, and optimize system resources.

